DTF transfers troubleshooting is the practical starting point for any garment printing project, helping you diagnose why designs fail to look right after transfer. This article walks through cracking, peeling, and misregistration, showing actionable steps to reduce downtime, waste, and reprints. To connect you with proven remedies, you’ll find insights framed around keywords such as DTF transfer cracking fix, DTF peeling solution, and DTF misregistration solution. A structured troubleshooting checklist guides you from symptom definition to material review, setup checks, test prints, and final validation. With the right parameters, materials, and discipline, you’ll achieve durable, accurately placed designs that stand up to washing and daily wear.
Beyond the acronym, the same challenges emerge under different terms such as direct-to-film printing problems, transfer film adhesion issues, fabric substrate compatibility concerns, and garment misalignment risks. LSI-friendly phrasing expands to discuss printer-to-press synchronization, calibration marks, color management, and workflow consistency—concepts that echo the core fixes, just with varied language. Think of cracking, peeling, and misregistration as signals from the production line—each pointing to a stage where heat, pressure, materials, or handling can be optimized. Using related terms can broaden search visibility and connect readers with diverse knowledge bases, from operators in small shops to production managers in large facilities.
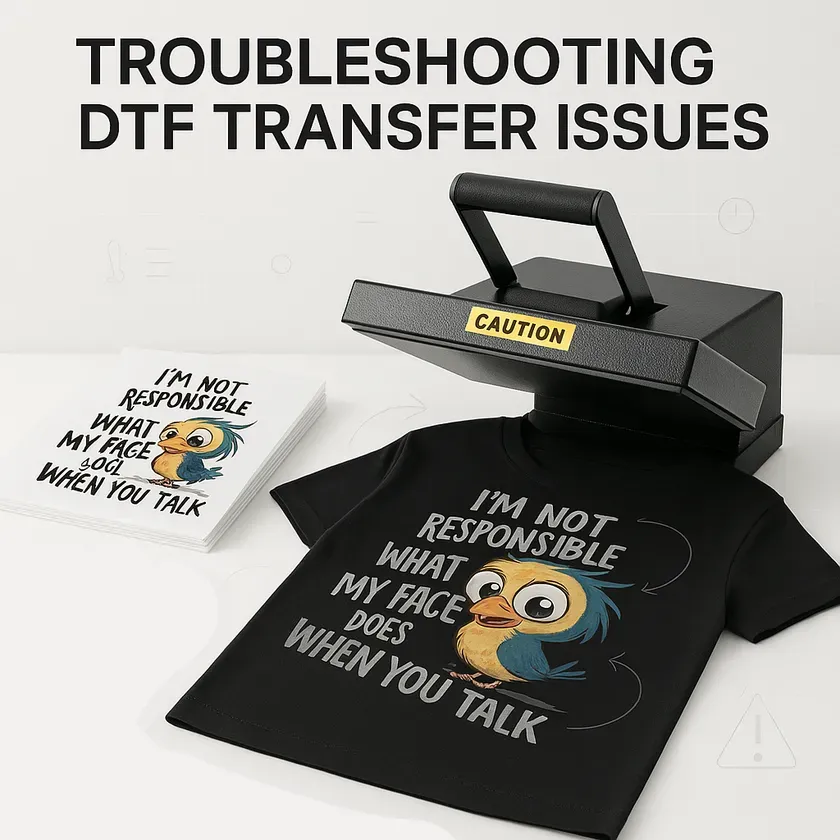
DTF Transfers Troubleshooting: A Structured Guide to Cracking, Peeling, and Misregistration
DTF transfers troubleshooting is a disciplined, repeatable approach designed to minimize downtime and waste while elevating print quality. By framing issues like cracking, peeling, and misregistration as solvable symptoms, operators can systematically identify root causes and apply targeted remedies. This descriptive, field-tested approach helps teams standardize their workflow and maintain consistent results across batches.
A practical starting point is recognizing what each symptom signals in the print-to-press workflow. The DTF transfer troubleshooting mindset combines material checks, printer and RIP alignment, heat press calibration, and post-press conditioning. When you map symptoms to likely causes, you’re better prepared to apply fixes with confidence, and you can reference the DTF transfer troubleshooting guide to ensure you’re following a proven sequence rather than guessing.
Cracking in DTF Transfers: Causes, Fixes, and the DTF Transfer Cracking Fix
Cracking typically indicates overstressed films, overcured adhesives, or delamination at micro-levels. Excessive heat or extended press times overcure the adhesive and the M–film layer, making the topcoat brittle and prone to fissures during flexing. Fabric tension and the quality of the transfer film also contribute, as do inconsistent platen pressure that creates localized hot spots.
Addressing cracking starts with careful parameter tuning. Calibrate the heat press to recommended temperatures and dwell times, ideally through a test-strip approach for each garment type. A prepress step reduces moisture and fiber movement that can propagate cracks, while ensuring film and powder materials are within specification minimizes micro-delaminations. For persistent issues, the DTF transfer cracking fix emphasizes checking tension and re-pressing with controlled pressure to set compromised areas, creating a more durable finish.
Peeling Issues in DTF Transfers: Achieving Bond Integrity with the DTF Peeling Solution
Peeling reveals insufficient adhesion between the transfer and fabric, often traced to inadequate powder curing, improper adhesive formulations, or moisture exposure to films. Substrate incompatibility and improper blending can also reduce the wet-out capability of the adhesive, while inadequate post-press cooling can prevent the bond from fully setting.
Solving peeling involves validating adhesive and curing parameters, improving storage and handling of films and powders, and confirming substrate compatibility. The DTF peeling solution mindset includes post-press conditioning to let the bond fully cure in a flat, controlled environment. By ensuring the right amount of adhesive is used and that cooling is complete before handling, you reduce the likelihood of edges lifting or entire sections peeling away.
Misregistration Solutions for DTF Transfers: Alignment, Calibration, and the DTF Misregistration Solution
Misregistration arises when the printer-to-press alignment is off, or calibration marks fail to synchronize across the workflow. Shifting during shirt loading, platen misalignment, poor color management, and uneven heat distribution can all cause the printed image to drift from the intended position.
Tackling misregistration begins with precise alignment marks and calibration routines that synchronize the printer and press. A dedicated jig or platen guides helps lock the garment in place, reducing movement during transfer. A streamlined workflow—with a test sheet on the same substrate and a sample transfer—verifies alignment before production, while consistent color management ensures the artwork lands in the correct location relative to the garment template. This aligns with the DTF misregistration solution approach to minimize positional errors.
DTF Transfer Troubleshooting Guide: A Complete, Practical Checklist from Prep to Post-Press
This comprehensive DTF transfer troubleshooting guide treats preparation, equipment checks, and post-press quality control as a single, repeatable process. By defining symptoms, inspecting materials, and reviewing print and press settings, teams reduce variability and accelerate issue resolution. The guide emphasizes documenting settings and outcomes so future runs benefit from a well-maintained knowledge base.
A practical, step-by-step checklist keeps operations focused: define the symptom, inspect materials and prep, review print and press parameters, run a controlled test, evaluate bond and finish, and iterate with documented results. Incorporating best practices—such as standardizing materials, calibrating gear, and maintaining an environment with stable humidity and temperature—helps prevent recurring DTF transfer issues and aligns with the broader DTF transfer troubleshooting guide framework. For those seeking explicit intervention prompts, this section also echoes how to fix cracking and peeling in DTF transfers through repeatable testing and parameter refinement.
Frequently Asked Questions
DTF transfer cracking fix: what is the first step to prevent or fix cracking in DTF transfers?
Start with the basics: verify heat, time, and pressure per your material guidelines and run test strips to dial in the exact settings. Prepress the fabric to remove moisture, ensure the transfer film and adhesive powder are within spec, and check fabric tension and platen pressure. After cooling, inspect for hairline cracks and re-press if needed on compromised areas to set the coating.
DTF peeling solution: what steps help reduce peeling after a DTF transfer?
Focus on adhesion and curing: confirm you apply the correct amount of adhesive powder and cure at the recommended temperature and duration. Store films and powders in a dry environment, test substrate compatibility, and let the garment cool completely after pressing to allow the bond to fully set.
DTF misregistration solution: how can I prevent misregistration during DTF transfers?
Calibrate alignment marks on the film and garment, and use a jig or platen guides to lock the fabric in place. Print a test sheet on the same substrate and verify alignment with a sample transfer, while maintaining consistent color management and RIP settings to keep artwork in place.
How to fix cracking and peeling in DTF transfers: practical steps to resolve common defects?
Address both issues with a coordinated approach: ensure controlled heat, time, and pressure; confirm proper film, powder, and adhesive curing; verify substrate compatibility; perform prepress and post-press cooldown, and run controlled tests on representative garments. Document settings that work to reduce rework and maintain consistency.
DTF transfer troubleshooting guide: what does a practical troubleshooting workflow look like for cracking, peeling, or misregistration?
Use a structured checklist: define the symptom, inspect materials and prep, review print and press settings, run a small test on the same substrate, evaluate bond and finish, and iterate with documented SOPs. Standardize materials, calibrate gear regularly, and control environmental factors to minimize variability.
| Topic | Key Points | Root Causes | Fixes / Remedies | Related Keyword |
|---|---|---|---|---|
| Cracking | Symptoms: fine lines or fissures in the design after transfer; may co-occur with other issues. | Excessive heat or long press time; high fabric tension; poor film quality or powder adhesion; inconsistent platen pressure. | Calibrate heat press to recommended temperatures and times; prepress to remove moisture; ensure film and adhesive powder are within spec; control tension; verify platen pressure; perform quick post-press checks after cooling. | DTF transfer cracking fix |
| Peeling | Symptoms: design lifts off fabric, partially or fully. | Inadequate powder curing or adhesive formulation; moisture exposure or improper film storage; incompatible substrates; improper post-press cooling. | Verify adhesive and curing parameters; store films/powders dry and stable; check substrate compatibility; allow complete post-press cooling and conditioning before handling. | DTF peeling solution |
| Misregistration | Symptoms: misaligned design relative to garment area; skew or shift from intended position. | Printer-to-press alignment errors; shifting during loading; inconsistent platen alignment; poor color management or misaligned artwork; uneven heat distribution. | Calibrate alignment marks; use jig or platen guides to lock garment; run a test sheet before production; maintain consistent color profiles and RIP workflows. | DTF misregistration solution |
| Troubleshooting Checklist |
|
|||
| Best Practices (Prevention) |
|
|||
| Common mistakes & myths |
|
|||
| Tools & Materials |
|
Summary
Conclusion: DTF transfers troubleshooting is a structured, iterative process that blends material selection, precise equipment calibration, and disciplined workflow management to deliver durable, high-quality results. By identifying root causes of cracking, peeling, and misregistration and applying targeted fixes, you can reduce downtime, minimize waste, and consistently achieve accurate transfers. Adopt a documented troubleshooting approach, refine your SOPs, and maintain your quality controls. With the right combination of materials, calibrated gear, and a controlled process, you can produce reliable DTF transfers that withstand washing and wear. If you found this guide helpful, consider building a formal SOP for your DTF workflow and sharing tips in comments, or subscribing for ongoing DTF transfers troubleshooting guidance.