DTF transfers heat time temperature are the core trio powering durable, high‑quality direct-to-film prints, and understanding how they interact with fabric type, ink formulation, coating chemistry, heat‑press geometry, and even operator technique helps you predict outcomes rather than chase unpredictable results across batches in a repeatable, scalable way. By understanding DTF heat settings and DTF transfer time guidelines, printers can set Direct-to-film printing temperature targets that deliver consistent adhesion, crisp edges, and uniform color density while reducing surprises in color transfer, texture, and durability across cotton, poly blends, and performance fabrics for designers and printers alike. When you balance these with DTF curing temperature and careful fabric selection, results become predictable rather than hit-or-miss, enabling you to optimize for different weights, fiber contents, moisture conditions, pre-press effects, and post-wash performance, so your best parameters translate from swatches to real garments. This introductory overview walks you through practical testing, calibration, and batch-to-batch consistency so a single project scales to an online shop, a studio, or a growing apparel line, with documented baselines, routine maintenance checks, and a simple log you can reuse to reproduce success; these steps help maintain consistency even when you switch films, inks, or garment brands. A disciplined approach to measuring outcomes across different fabrics and inks keeps edge quality, color density, washfastness, and overall durability reliably high, while guiding you to refine parameters, standardize procedures, and extend your learnings into future runs, so production becomes progressively faster and more predictable and ongoing optimization cycles.
In plain terms, the concept can be framed as how heat application, dwell duration, and surface temperature translate into bond strength between ink and textile. LSI-friendly phrasing adds layers like bonding threshold, curing window, press parameters, substrate compatibility, adhesion quality, and post-wash performance, connecting this topic to related discussions in film chemistry, textile science, and industrial printing. By using synonyms and related terms such as heat press settings, coating guidelines, and process windows, the content becomes more discoverable while staying practical for makers and shop owners. This approach also helps readers understand that small changes in heat, time, or pressure ripple through durability and color fidelity, guiding them to design simple, repeatable workflows.
DTF transfers heat time temperature: Balancing Core Variables for High-Quality Prints
DTF transfers heat time temperature are the core ingredients of a successful Direct-to-Film transfer. In practice, achieving vibrant, durable designs hinges on keeping heat, dwell, and target temperature in a stable relationship across projects. This balance must consider fabric type, ink formulation, film adhesive, and the press itself to deliver repeatable results and minimize issues such as ghosting, edge crackling, or reduced washfastness.
To optimize DTF heat settings, begin with the manufacturer’s baseline and run a small matrix of tests that vary one variable at a time. When exploring Direct-to-Film printing temperature, many operators start around 305–325°F (150–163°C) with a controlled dwell and adjust in small increments while documenting outcomes on representative swatches. Remember that heat interacts with pressure, fabric weight, and adhesive performance, so keep meticulous notes to build a reliable reference for future batches.
DTF Transfer Time Guidelines: Precision in the dwell period yields durable adhesion
Time, or dwell, is the window when the adhesive activates and bonds to the fabric. Following DTF transfer time guidelines helps ensure complete curing without overheating delicate fibers. Most garments respond best to a dwell in the teens of seconds, and consistency across runs reduces variability in adhesion, texture, and color density.
Document a simple test plan: fix temperature, vary dwell in small steps (for example 2-second increments), then test a slight temperature bump while holding time steady. Recording wash tests and visual inspections after multiple cycles helps validate durability and washfastness. By keeping a detailed log of temperature, time, pressure, and results, you can establish dependable parameters for different fabrics.
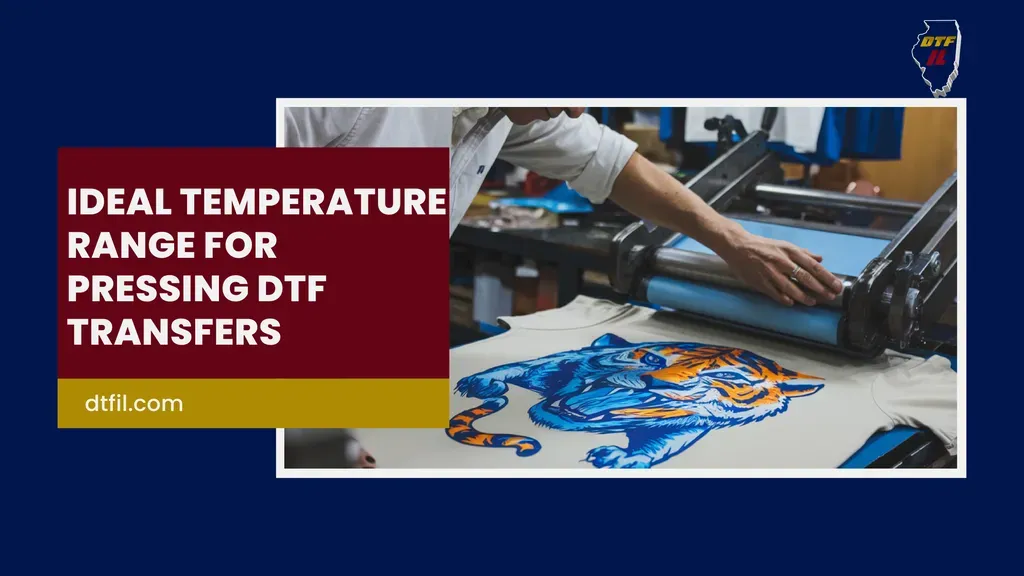
DTF Press Instructions for Durable, Vibrant Results
DTF press instructions emphasize consistent pressure, even heat, and proper protection for the garment. Use a silicone or teflon sheet to shield the fabric and a release film that ensures clean transfers, while maintaining even contact between the platen and the design. Pre-pressing helps flatten fibers and reduce moisture, setting the stage for a clean, durable bond.
Calibrate your equipment regularly to avoid hot spots and temperature drift. Ensure the platen is clean and free of residues, replace worn silicone sheets, and verify that the film coating remains consistent across batches. These practices, combined with stable Direct-to-Film printing temperature and precise dwell, support reliable transfer quality and edge-to-edge color density.
Direct-to-Film Printing Temperature and Fabric Compatibility
Direct-to-Film printing temperature plays a major role in how ink adheres to fabric and how subsequent wash cycles affect durability. Different fabrics respond differently to identical settings, so matching temperature to fabric type is essential. Along with dwell and pressure, the printing temperature interacts with ink formulation and adhesive performance to determine adhesion strength and color fidelity.
Fabric compatibility guides often suggest cotton and high-cotton blends tolerate standard parameters well, while polyester and poly-blends may require lower dwell or slightly lower temperatures to prevent gloss or cracking. By aligning your Direct-to-Film printing temperature with fabric characteristics, you minimize scorching risk on delicate items and maintain consistent results across product lines.
Troubleshooting DTF: Addressing Ghosting, Cracking, and Scorching with Proper Heat Settings
When issues like ghosting, faint adhesion, or edge cracking appear, review your DTF heat settings and dwell parameters first. Faint prints often indicate insufficient temperature or insufficient dwell, while cracking or edge peeking can point to excessive heat, too-long dwell, or moisture-related pre-press flaws. A systematic check of pressure, platen condition, and film quality is essential.
Adjust parameters in small steps—slightly increasing or decreasing temperature or dwell—then re-test on representative swatches. Verify even pressure, inspect the transfer surface for hot spots, and keep equipment calibrated. By addressing heat settings, transfer time guidelines, and pre-press practices, you can reduce repeat issues and achieve consistent, durable transfers.
Frequently Asked Questions
How do DTF transfers heat time temperature affect print durability, and how should I set DTF heat settings for best results?
DTF transfers heat time temperature must be balanced: heat activates the adhesive, time cures the bond, and temperature controls penetration. Start with the manufacturer’s baseline for your film and adhesive, typically about 305-325°F (150-163°C) for 12-20 seconds. Make small, swatch-based adjustments and document outcomes. Use even pressure, a pre-press, and avoid overheating to prevent scorching or edge distortion.
What are the recommended DTF transfer time guidelines to achieve consistent bonding across fabrics?
DTF transfer time guidelines suggest a dwell of 12-20 seconds, with adjustments for fabric weight. Keep temperature constant while testing and vary dwell time in small increments. Use representative swatches, document results, and test wash durability after cycles. Maintain a simple log to support batch consistency.
What curing temperature should I use for DTF transfers to maximize durability without scorching fabrics?
Use a curing temperature around 305-325°F (150-163°C). Higher temps bond faster but can scorch delicate fabrics; calibrate your press regularly and use a digital thermometer or the press readout. Test on swatches and follow your film adhesive guidance for best results.
What are the essential DTF press instructions to achieve clean edges and even density?
Key DTF press instructions include a 2- to 5-second pre-press, even pressure, and protection with a release film and silicone sheet. Place the transfer with film facing up, press at the target temperature for about 15 seconds, and remove the carrier while warm or after cooling per film guidance. Inspect adhesion and edge quality, and keep the platen clean to prevent defects.
How does Direct-to-film printing temperature affect adhesion and washfastness across different fabrics?
Direct-to-film printing temperature directly affects adhesion and washfastness. Too high a temperature can cause gloss or scorching on some fabrics, while too low may leave incomplete curing. Start with an approved baseline, then test across fabrics (cotton, poly blends) and adjust dwell time and temperature accordingly. Document results to guide future batches.
| Key Point | Description |
|---|---|
| Definition | DTF transfers heat time temperature are the core ingredients of a successful Direct-to-Film transfer. |
| Core concept | In practice, achieving vibrant, durable designs hinges on getting these variables right and keeping them consistent across batches. |
| Heat settings (target range) | Most common range is 305–325°F (150–163°C) for a short dwell; higher temperatures can speed bonding but may scorch or distort; start with manufacturer baseline and adjust gradually. |
| Dwell time (duration) | Typical dwell is about 12–20 seconds; too little leads to incomplete transfer, too much risks scorching or distortion; stay consistent across fabrics. |
| Temperature accuracy & equipment health | Maintain a stable, calibrated temperature and ensure even heat distribution; monitor drift, use pre-heat or silicone pad to even heat, and keep platen clean. |
| Pre-press & fabric prep | Pre-press 2–5 seconds to remove moisture and flatten fibers; cooldown briefly before transfer; 100% cotton or high-cotton blends respond best; poly blends may need adjustments. |
| Testing, documentation & batch consistency | Create controlled tests with swatches, vary one parameter at a time, and document results (temperature, time, pressure) and wash tests to build a reliable reference. |
| Fabric-specific considerations | Natural fibers like cotton handle heat well but can scorch; polyester blends are more heat sensitive and may require shorter dwell; darker fabrics reveal defects; adjust for heavier vs lighter items. |
| Practical guidelines | Start with manufacturer baselines; pre-press 2–5 seconds; maintain consistent pressure; test on swatches; log results; if ghosting or faintness, slightly increase dwell/temperature in small steps; if scorching, decrease temperature or shorten dwell. |
| Simple protocol (summary) | Prepare a sample; pre-press; place transfer; press at baseline dwell (e.g., 15 seconds); remove carrier warm or cooled per film guidance; inspect adhesion; wash-test after cycles; refine parameters. |
| Troubleshooting snapshot | Faint adhesion: increase dwell by 2–3 seconds or raise temperature; cracking/edge peeling: reduce temperature and dwell; heat marks: lower temperature; color bleed: reduce heat or dwell; check platen alignment and test with different fibers. |
| Quality control & optimization | Maintain ongoing QC, compare weekly batches, and set process windows (e.g., Temperature 320±5°F; Time 15±2 seconds; Pressure: medium) and train operators to stay within limits. |
Summary
DTF transfers heat time temperature are a balanced trio that you tune to your equipment, films, and garment types to achieve durable, vibrant prints. By following manufacturer baselines, performing careful tests, and maintaining rigorous equipment checks, you can achieve consistent results across fabrics and products. This approach supports a repeatable, scalable process for high-quality transfers batch after batch, with documentation and quality control guiding continuous improvement.