DTF transfers for beginners open a doorway to professional looking custom garments without years of screen printing experience. This guide walks you through fundamentals, including how to avoid DTF errors and achieve strong, durable results. Along the way you’ll encounter practical insights aligned with DTF printing basics and references to common DTF transfer mistakes to help you stay on track. By choosing the right materials and following a simple, repeatable workflow, you can achieve professional results that look great on cottons, blends, and other fabrics. Throughout this article you’ll see steps for avoiding common DTF transfer mistakes and applying heat press tips that keep colors vibrant and finishes durable, and you’ll find practical DTF transfer troubleshooting strategies.
For newcomers to direct-to-film transfers, the journey begins with a clear design plan, fabric choices, and a reliable workflow. From an LSI perspective, the topic expands to related terms such as the film-based transfer method, adhesive powder application, and a heat-press routine that yields consistent results. Labeling concepts as a modern alternative to traditional screen printing helps beginners relate to color management, substrate compatibility, and durable finishes across different fabrics. As you explore this technique, you’ll see practical steps and equipment considerations that reinforce the broader ideas behind DTF printing basics, DTF transfer troubleshooting, and the practical tips that enable repeatable success.
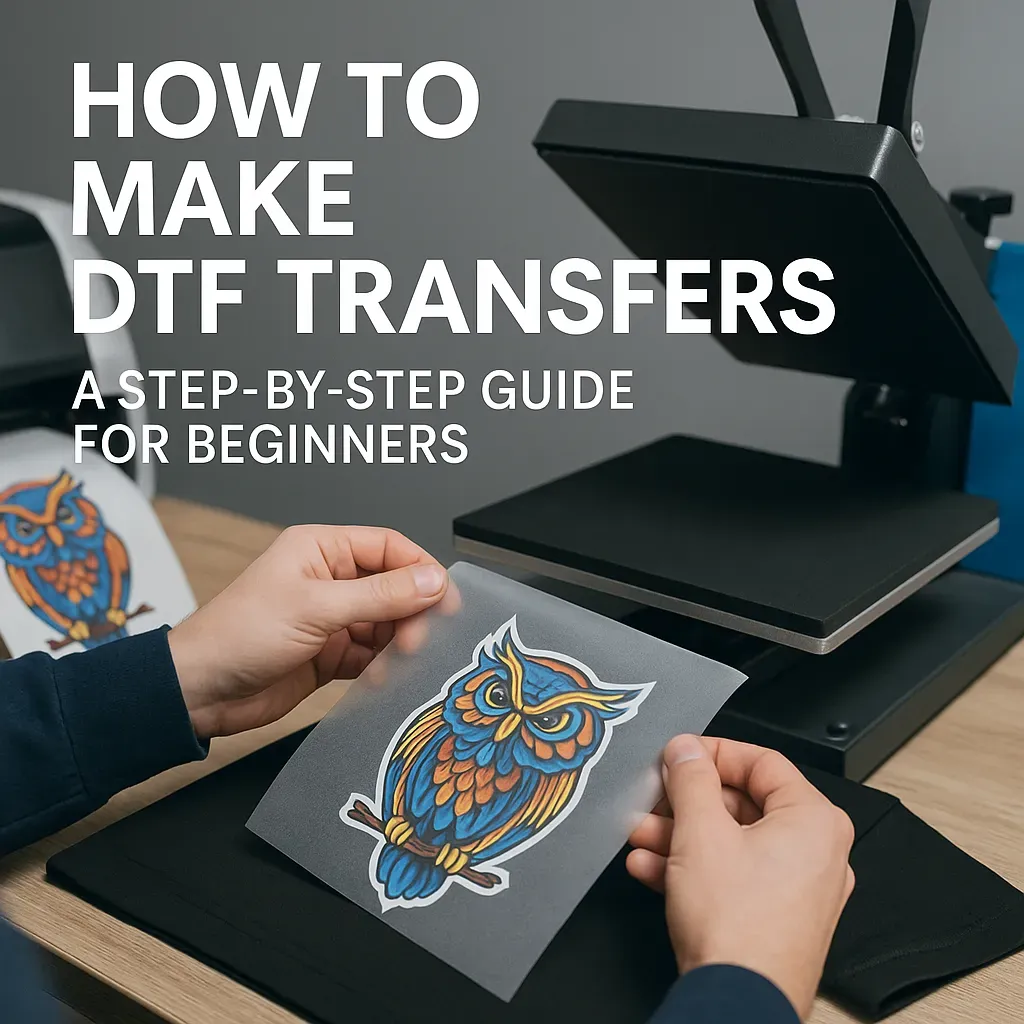
DTF transfers for beginners
DTF transfers for beginners unlock a practical path to high-quality garments without years of screen printing. By focusing on core concepts—design, print, adhesive powder application, curing, and heat pressing—you can achieve professional-looking transfers with consistent results.
Adopt a repeatable workflow to minimize waste and build confidence. Start with a high-resolution design, use a compatible DTF ink set and film, spread the adhesive powder evenly, cure it thoroughly, and press the transfer onto your fabric at the recommended temperature, time, and pressure.
Practice on fabrics similar to your end products and keep notes on settings that work. With time, you’ll develop a reliable library of designs, films, and powders that produce vibrant colors and durable adhesion.
DTF printing basics and workflow essentials
DTF printing basics include selecting a printer that supports water-based inks, choosing PET film sheets, and sourcing a compatible adhesive powder. Getting these choices right sets the foundation for color fidelity and detail.
Set up a repeatable workflow: test on fabric swatches, verify color accuracy, and confirm margins to prevent edge bleed. Then move to the powder application and curing steps, ensuring a thin, even coating with no clumps.
The curing stage is critical; improper curing can leave the powder tacky or cause poor adhesion. Pair correct film and ink with a stable heat source and monitor the process to maintain consistency across projects.
Common DTF transfer mistakes and prevention strategies
Common DTF transfer mistakes include misalignment during pressing, uneven powder coverage, under or over curing, and incorrect press temperature. These issues can compromise color, durability, and overall appearance.
Prevent misalignment by using alignment aids, partial tapes, and keeping the garment flat during transfer. Ensure the adhesive powder coats evenly and follows manufacturer guidelines for curing temperatures and times.
Ambient factors like humidity and fabric weave also influence results. Start with a test on a fabric close to your end product to learn how the transfer behaves under real conditions.
DTF heat press tips for crisp, durable transfers
DTF heat press tips emphasize controlled temperature, pressure, and dwell time. A practical starting point for many cotton blends is around 160 to 170 C (320 to 338 F) for 12 to 15 seconds, then adjust based on fabric and ink performance.
Apply even, fixed pressure and avoid sliding the transfer during pressing. Pre-press the garment briefly to remove moisture and create a smooth surface, which helps with consistent adhesion and edge definition.
After pressing, allow the transfer to cool before removing the carrier sheet. If you see wrinkles or a soft edge, re-press with identical settings for a few extra seconds to reinforce adhesion.
DTF transfer troubleshooting and how to avoid DTF errors
DTF transfer troubleshooting and how to avoid DTF errors start with a methodical evaluation of print and press steps. If the image looks pale, verify print settings and confirm proper curing of the ink.
If the transfer lifts or peels, re-check the pressing temperature and time as well as the fabric content and any pre-washing that may affect adhesion. For misalignment, use alignment aids to keep the design centered.
Quality control for beginners benefits from small test runs, documenting exact temperatures, times, and pressures used. Regularly clean equipment, maintain powders and films, and maintain a simple checklists to guide future projects—this aligns with best practices for how to avoid DTF errors.
Frequently Asked Questions
What are DTF transfers for beginners and how do I get started with DTF printing basics?
DTF transfers for beginners describe the direct-to-film process that uses a PET film, adhesive powder, and a heat press to transfer vibrant designs onto fabric. To start with DTF printing basics, choose a printer that supports water-based DTF inks, stock quality DTF film and powder, and a reliable heat press, then follow a simple workflow: design in high resolution, print on film, apply and cure the adhesive powder, pre-press the garment to remove moisture, and press at the recommended temperature, time, and pressure for your fabrics.
What are common DTF transfer mistakes beginners should avoid when learning DTF printing basics?
Common DTF transfer mistakes include misalignment during pressing, uneven or insufficient powder coating, under- or over-curing, and incorrect heat or dwell time, all of which can cause peeling or cracking. To avoid these, use alignment aids or tape, apply the powder evenly with a dedicated applicator, follow the manufacturer curing guidelines, calibrate your printer, and run tests on similar fabrics before larger runs.
How can I avoid DTF errors in my workflow for DTF transfers for beginners?
Follow a repeatable, documented workflow: verify your design file and color profile, keep consistent margins, properly calibrate the printer for DTF inks, apply and cure adhesive powder evenly, pre-press the garment to remove moisture, and then press at the right temperature, time, and pressure. This structured approach minimizes misprints, misalignment, and adhesion issues.
What DTF heat press tips should beginners know to improve transfer quality?
Key DTF heat press tips include pre-pressing the garment to remove moisture, starting with a moderate temperature around 160–170 C (320–338 F) and 12–15 seconds for many cotton blends, and applying firm, even pressure. Always test settings on scrap fabric to dial in your equipment, keep the platen clean, and remove the carrier sheet after a brief cooldown to avoid ghosting.
What troubleshooting steps should I follow when facing issues with DTF transfer troubleshooting for beginners?
Follow a methodical approach: check alignment and secure the transfer with tape, verify that the powder has cured completely and that the ink is fully cured, re-check the press temperature and time for the fabric type, and run a small test on swatches to isolate variables. If edges lift or color shifts occur, adjust pressure or re-press; if the image looks pale, recalibrate color profiles and ensure proper curing. Keeping notes on each test helps you reproduce reliable results.
| Topic | Key Points | Tips / Notes |
|---|---|---|
| What DTF transfers are | Direct to Film uses a PET film to hold the printed ink with an adhesive powder. After printing, the powder is applied, cured, and the transfer is heat pressed onto a garment. The result is a flexible transfer with vibrant colors and fine details. | Core concepts: design in high resolution, print with compatible DTF inks, apply adhesive powder, cure properly, and press with correct temperature, time, and pressure. |
| DTF printing basics | Key decisions include fabric types, printer compatibility, and layout. Start with a test run on fabric similar to typical projects. Verify color accuracy, layering, and adhesion. | Use a printer that supports water-based DTF inks; apply a thin, even coating of adhesive powder to avoid clumps; curing is critical to prevent tackiness and poor adhesion. |
| Workflow stages | Stages include: design preparation (vector, high resolution); printing with correct color settings; uniform powder application; curing; transferring with proper heat-press settings. | Uniform powder coating reduces lifting/cracking; maintain clear margins to prevent edge bleed; choose compatible inks/film for color fidelity. |
| Common mistakes | Misalignment during pressing, poor powder fixation, under/over curing, and incorrect press temperature. Ambient moisture and fabric type also influence outcomes. Powder/film/adhesive differences can cause issues. | Solutions: use alignment aids or tape, ensure complete curing, follow manufacturer guidelines for temperature/time, and perform small tests before larger runs. |
| Equipment & materials | DTF printer with water-based inks, DTF film sheets, adhesive powder, a curing method/device, heat press, clean workspace, test garments. | Keep a dry, dust-free environment; ensure consistent surface quality of film and powders. |
| Step-by-step practical workflow | Design high-resolution artwork, print on DTF film with correct color management, apply and cure adhesive powder, pre-press garment to remove moisture, press with recommended temperature/time/pressure, then remove the carrier sheet and cool. | Keep notes for different fabrics and project sizes; maintain a reliable set of best practices. |
| Troubleshooting | Pale/washed-out images, misalignment, lifting, ghosting, or tacky surfaces after pressing. | Check print settings and curing, verify press temperature/time, test with swatches for adjustments. |
| Quality control | Run small tests, inspect color fidelity, texture, and adhesion; document exact temperature, time, and pressure for reproducibility. | Use the documentation to reproduce successes and avoid repeating issues. |
| Maintenance & care | Regularly clean printer and film surfaces; check heat press platen for residue; store powders in a cool, dry place; keep a maintenance calendar. | Minimize moisture exposure during powder application and curing; routine upkeep prevents performance drops. |
| Summary / Practical outcome | DTF transfers for beginners yield impressive results when a repeatable process is followed and fundamentals are mastered. | Focus on fundamentals, reliable workflow, and ongoing practice to improve durability and vibrancy across projects. |